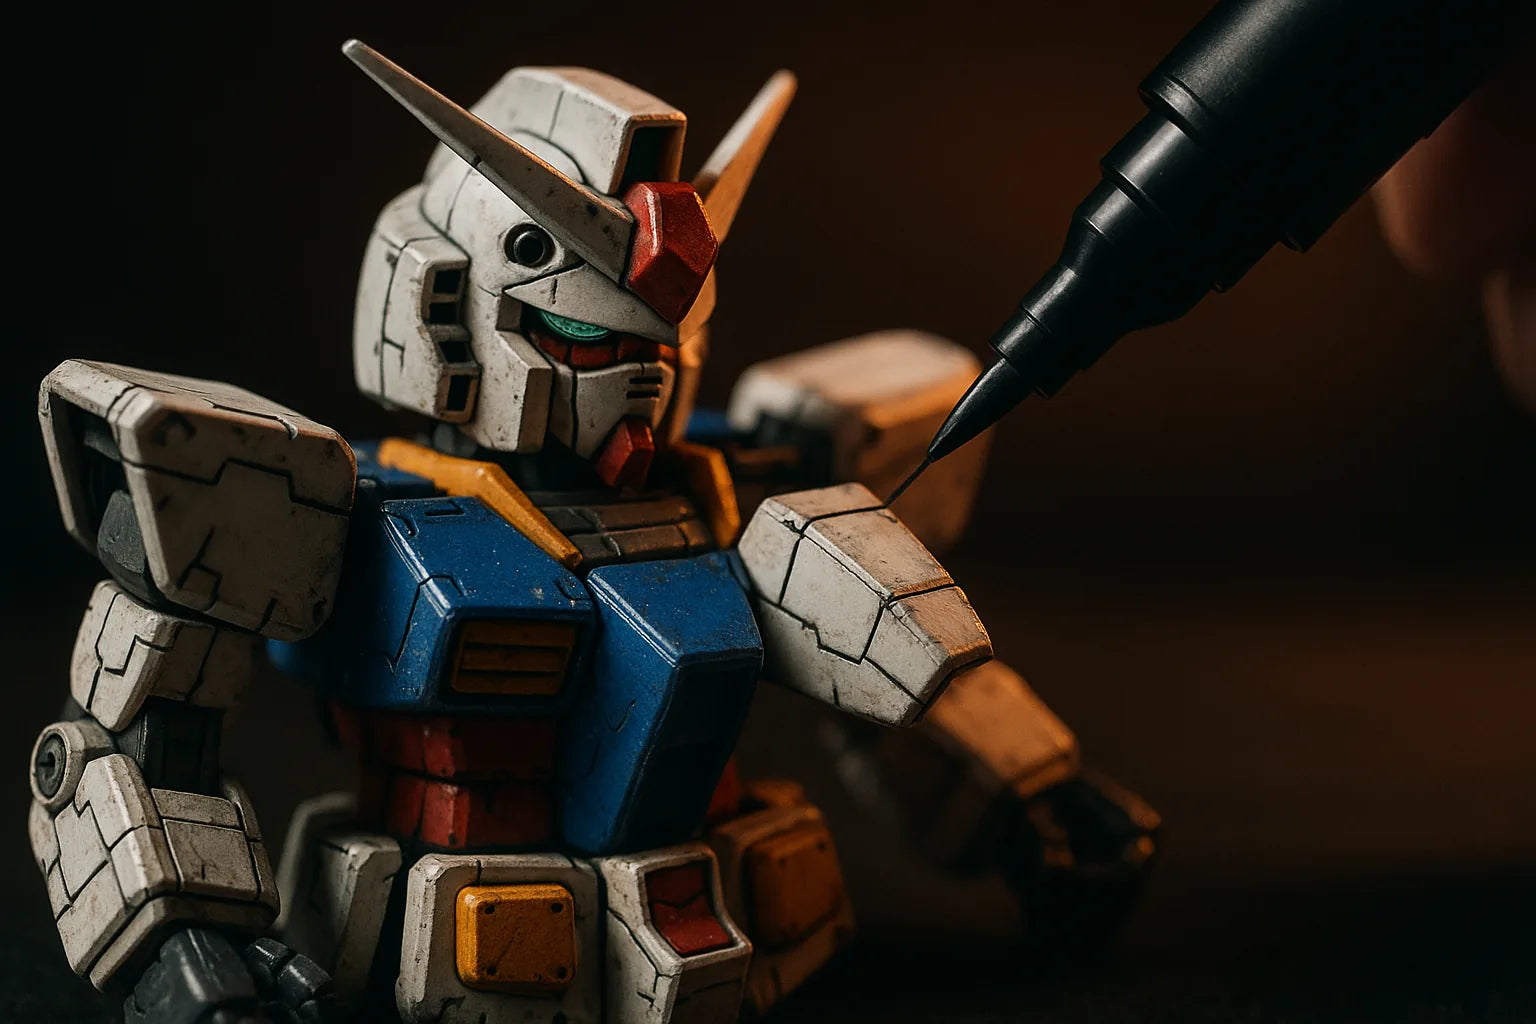
Panel lining is the single fastest way to make a Gunpla kit look finished. Straight out of the box, your model already has crisp molded detail, but those recessed lines and panel gaps tend to disappear against flat plastic. Adding a thin, dark line into every groove instantly creates shadow, depth, and a sense of real mechanical scale. If you have ever wondered why a friend's build looks sharper than yours despite being the same kit, panel lining is almost always the reason.
The good news is that panel lining is one of the most beginner friendly techniques in the hobby. You do not need an airbrush, a paint booth, or years of practice. With a couple of affordable products and a little patience, you can dramatically upgrade your very first build. This guide walks you through every step, from choosing your method to fixing mistakes, so you can panel line with confidence.
What Is Panel Lining and Why It Matters
Panel lining is the process of running a dark, thin line of paint or ink into the recessed details of a model. These recessed areas are called panel lines, and they represent the seams, hatches, vents, and armor plates of a real mechanical machine. By darkening them, you mimic the natural shadows that would appear on a full sized object, which makes the model read as larger and more detailed than it actually is.
Without panel lining, a kit can look like a solid toy. With it, the same kit looks like a scaled down piece of engineering. It is a low effort, high reward technique, which is exactly why almost every experienced builder does it. Because you are only adding color to grooves that already exist in the plastic, the risk is low and the payoff is immediate.
The Two Main Panel Lining Methods
There are two beginner approaches you will see everywhere in the hobby. The first is using a fine tipped marker, and the second is using an enamel or oil based wash. Both produce excellent results, and many builders eventually use a mix of the two depending on the kit. Understanding the difference will help you pick the right tool for your skill level and your model.
Method 1: Gundam Markers
The marker method is the ideal starting point for anyone new to the hobby. A panel lining marker has a very fine tip and holds a thin ink that flows into recessed detail through capillary action. You simply touch the tip to a panel line and let the ink run along the groove. It is quick, controllable, and requires almost no setup. You can browse a full range of dedicated Gundam markers to get started, and the black and gray shades cover the vast majority of builds.
How to Apply a Marker
Start by shaking the marker with the cap on, then prime the tip on a scrap piece of runner until the ink flows evenly. Hold the model at a slight angle so gravity helps pull the ink down the line, then lightly drag the tip along each recessed groove. Do not press hard. The goal is to let the ink flow, not to force it. Work one panel at a time and let the ink settle into corners naturally.
Cleaning Up Marker Overflow
Markers will occasionally bleed slightly outside the line, which is completely normal. Once the ink is fully dry, gently rub the excess away with a cotton swab or a soft cloth. For water based panel lining markers you can dampen the swab with a little water, while alcohol based markers respond well to a cotton swab lightly moistened with rubbing alcohol. Always test cleanup on a hidden area first so you do not lift more ink than you intend.
Method 2: Enamel Wash
Once you are comfortable with markers, an enamel wash is the next step up in realism. A wash is a very thin, diluted paint that you flood along a panel line. Capillary action pulls the fluid deep into every groove, giving you cleaner, more consistent coverage than a marker in complex areas. Washes are especially good on large armor panels and tightly detailed sections where a marker tip struggles to reach.
Mixing and Applying a Wash
You can buy a pre mixed enamel panel line wash or thin your own enamel paint with enamel thinner until it has a watery consistency. Load a fine brush, touch it to the start of a panel line, and watch the fluid travel along the groove on its own. Follow the line around the part, reloading the brush as needed. Because the wash is so thin, it naturally settles into the deepest detail and leaves the raised surfaces mostly clean.
Cleaning Up an Enamel Wash
After the wash has dried for several minutes, dampen a cotton swab with a small amount of enamel thinner and wipe away the excess in the direction of the panel line. The thinner removes the paint from flat surfaces while leaving the pigment protected inside the recesses. Work in gentle strokes and refresh your swab often so you are not smearing removed pigment back onto the part.
An Important Safety Note on Enamel
Enamel washes can stress bare plastic, especially at stress points like pegs and thin edges, which may cause tiny cracks over time. To avoid this, many builders apply a protective clear coat before washing, which brings us to the next step. Always work in a well ventilated area when using enamel products, and keep thinner away from heat.
Sealing Your Work With a Top Coat
A top coat is a clear spray that seals and protects your panel lining while unifying the finish of the entire model. It is the step that ties everything together and gives your build a professional, cohesive appearance. A top coat also protects marker ink from rubbing off during handling and posing, which matters a lot on an articulated kit.
Matte, Semi Gloss, or Gloss
Top coats come in different sheens. A matte or flat finish removes the toy like shine of raw plastic and is the most popular choice for a realistic mechanical look. Semi gloss sits in the middle, while gloss produces a bright, reflective surface that suits sleek or display focused builds. Explore the available top coats and choose the sheen that matches the mood you want.
How to Spray a Top Coat
Shake the can thoroughly, hold it around fifteen to twenty centimeters from the part, and apply several light passes rather than one heavy coat. Light layers prevent pooling and frosting. Let each pass flash off for a minute before the next, and always spray in a ventilated space. If you plan to use an enamel wash, spray a first protective coat before washing, then a final coat afterward to lock everything in.
Tools You Will Need
Panel lining does not demand an expensive workspace, but a few basics make the process smoother and cleaner. A fine detail brush, cotton swabs, a sharp hobby knife or nippers for clean parts, and your chosen marker or wash will cover almost every situation. Having the right supplies on hand from a set of quality hobby tools means you spend less time fighting your gear and more time enjoying the build.
- A fine tip panel lining marker in black and gray
- An enamel wash or thinned enamel paint for advanced detail
- Cotton swabs and a lint free cloth for cleanup
- Rubbing alcohol or enamel thinner, matched to your medium
- A clear top coat spray in your preferred sheen
- A well lit, ventilated workspace
Common Panel Lining Mistakes to Avoid
Most panel lining problems come from a handful of easy to fix habits. Learning them ahead of time will save you frustration and keep your models looking clean.
Using Too Much Ink or Wash
Flooding a line with far more fluid than it can hold leads to heavy bleeding and long cleanup. Apply a small amount, let capillary action do the work, and add more only if a line looks incomplete. Restraint almost always looks better than excess.
Wiping Before It Dries
Cleaning up too early smears wet pigment across the surface instead of removing it cleanly. Give marker ink or wash a few minutes to set, then wipe in the direction of the line. Patience here is the difference between a crisp result and a muddy one.
Panel Lining Over Bare Plastic With Enamel
Applying an enamel wash directly onto unprotected plastic at stress points can cause cracking. Seal the model with a clear coat first, especially on joints and thin edges, to keep your kit structurally safe.
Choosing the Wrong Color
Pure black can look harsh on light or brightly colored armor. Gray or brown lines often read more naturally on white and pastel parts, while black suits darker armor. Matching the line color to the part gives a more believable, integrated finish.
Choosing Your First Marker
If you are still deciding where to begin, start with a single fine tip marker and one simple kit. Markers give you the fastest feedback loop, the easiest cleanup, and the lowest risk while you build confidence. Once you have lined a kit or two and enjoyed the result, you can graduate to washes and top coats. For a curated breakdown of which pens work best for different finishes, see our guide to the best Gundam markers before you commit to a set.
Final Thoughts
Panel lining is proof that a small technique can transform an entire model. With nothing more than a fine tip marker, a steady hand, and a few minutes per part, you can turn a flat build into a detailed, shadowed, professional looking display piece. Start simple with a marker, practice your cleanup, protect your work with a top coat, and avoid the common mistakes above. Before long, panel lining will become the automatic first step of every build you finish, and your shelf will show the difference.